Printing on Glass
There is more to photography than just printing on paper. Don't get me wrong; paper is great, and there is a lot of diversity in printing on it. Plus, paper is the go-to option for everyone wanting to display family photos on the wall, and it's one of the more affordable printing surfaces available. However, there are several other surfaces on which you can print to elevate your work. Options such as fabric, glass, wood, metal, and ceramic are just a few; the list goes on. You can either outsource your images for professional printing or do it yourself using materials available at local craft stores.
For the purpose of this post, I will describe my process of printing on glass by myself. I will include links, descriptions, and images to showcase how I printed on glass. The overall process is not hard and allows you to be creative, putting the artist's hand back into photography.
When I first started, I researched several possible methods for printing on glass. You can use Mod Podge, clear sticker paper, or inkAid. Each provides different results, so the method you choose will depend on your desired outcome.
For this post, I decided to use the inkAid method. The process itself seems quite straightforward. You mix the inkAid Transferiez Image Transfer with 91% isopropyl alcohol, apply it to the desired surface, and then use the inkAid transfer film to transfer your image onto that surface. The only downside I see with this method is the expense. The materials are quite specialized; although not excessively priced, the film sheets appear to be for one-time use only. If you plan to experiment with trial and error, your budget may not allow for much leeway.
Link to Materials and Tutorials:
https://inkaid1.com/collections/inkaid-transfer-film
The film is transparent and is compatible only with inkjet printers that use pigment inks; dye inks do not adhere to the solution. Additionally, the film has only one printable side; the package indicates which side it is, and the print side has a slightly sticky texture in case you forget.The Transferiez solution is a glue-like substance that you mix with 91% isopropyl alcohol. It is one tablespoon of Transferiez to half a cup of alcohol, which can be purchased at your local drug stores. It takes overnight for the solution to dissolve completely.
Applying the solution is not hard; you spread it over the surface. I used a sponge brush, which provided an even coating, and then placed the film, sticky side down. Gently rub the image for 2 minutes to ensure it adheres to the surface. After 2 minutes, peel off the film, and the print should remain on the surface. This will take several tries before you can achieve a perfect or almost perfect transfer. With printing on glass or any other surface, you have to embrace the imperfections and understand that you may never get a completely clean transfer onto the surface.
During the process I faced two challenges: the first was determining how much solution to apply; too much causes the ink to spread and distort the image, while too little results in poor adhesion. The second challenge was using the appropriate amount of pressure to ensure a successful image transfer. It requires a delicate balance that will take more time to perfect. You may notice areas where the image did not adhere properly, resulting in ripped edges or spots in the middle of the print.
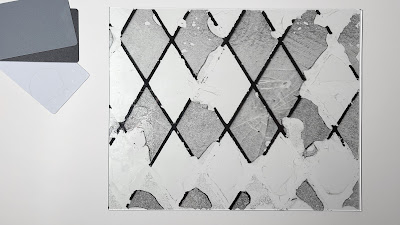
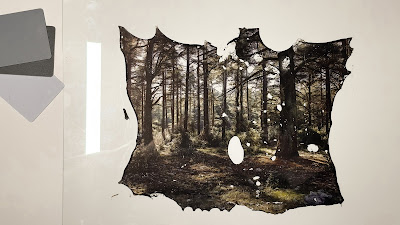
Overall I am very happy with the results! The image quality is surprisingly good, and image retained the details surprisingly well, and the contrast is spot-on. The final results are still not perfect, but I enjoyed the results and I event tried to be more intentional with the results and where the transfers would stick and not stick.
Here are the final results:


Comments
Post a Comment